
Zoom is a widely used cloud-based video conferencing platform used for video and audio conferencing, webinars, meeting recordings, and more. DNIF can collect, normalize, and monitor Zoom logs to help you identify abnormal activity within your Zoom account in real time.
Pre-requisites
- Client ID
- Client Secret
- Account ID
Steps to derive prerequisites:
- NOTE: While logged in to Zoom as a user with the Admin role, go to the Zoom roles page and verify that your Zoom user account has the following required permissions:
- The Usage reports view permission.
- The Sign In/Sign Out view permission.
- The Admin Activity Logs view permission.
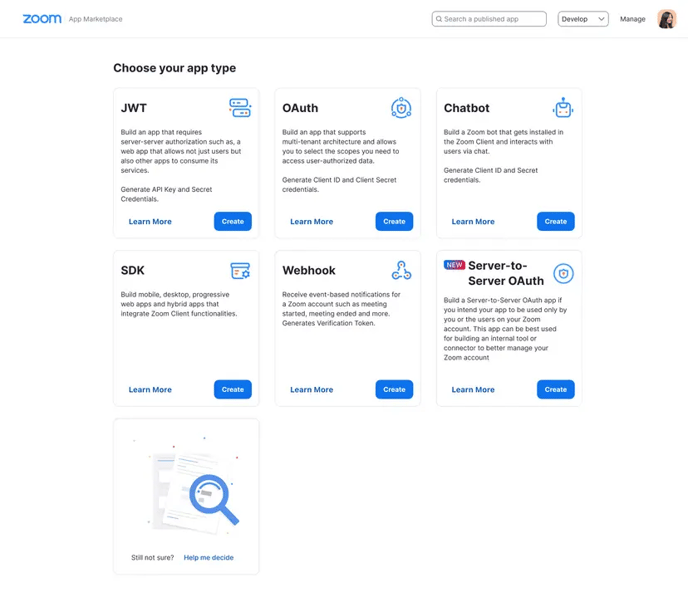
- Go to the Zoom App Marketplace and Sign In to your Zoom account.
- Click Develop in the dropdown menu in the top-right corner of the page and select Build App. A new page will appear displaying the available app types.
- Click Create in the Server-to-Server OAuth section.
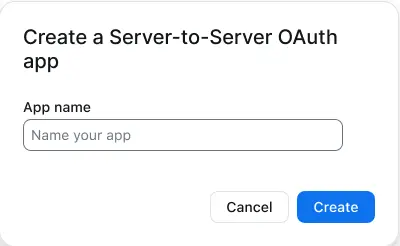
4. Add a name for your app and click Create.
5. App credentials: Copy and note your account ID, client ID and client secret. You'll use these credentials in the Zoom Connector configuration.
6. Information: Add information about your app, such as a short description and developer contact information (name and email address required for activation).
7. Features: Skip this step.
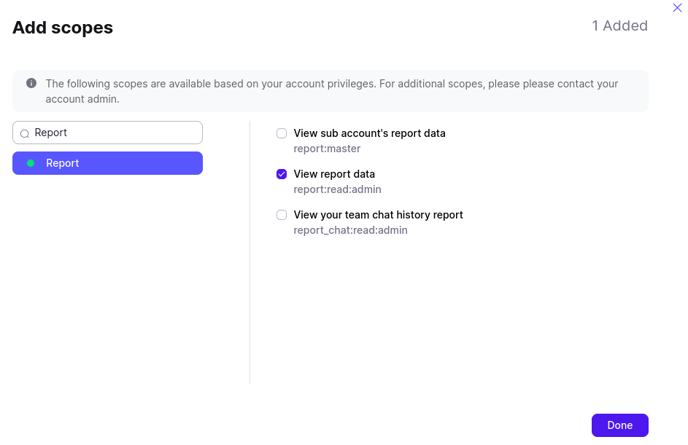
8. Scopes: Click on Add Scopes then search for Report and choose "View report data" (report:read:admin) scope.
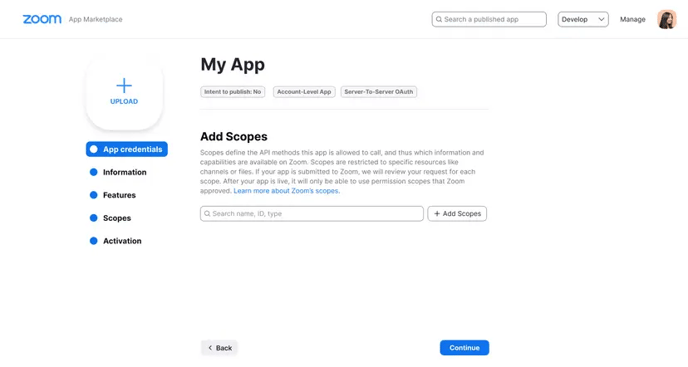
9. Activation: Click to Activate your app in this section.
Reference Document: https://developers.zoom.us/docs/internal-apps/create/
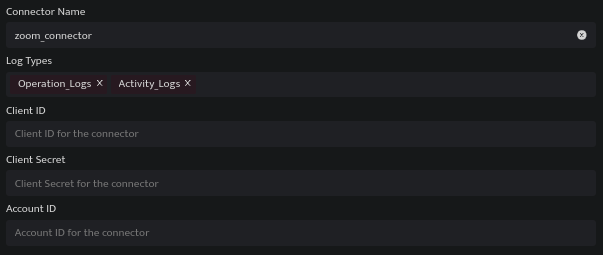
Configurations
The following are the configurations to forward Zoom Connector logs to DNIF.
|
Field Name |
Description |
|
Connector Name |
Enter a name for the connector |
|
Log Types |
Enter Zoom Log Types |
|
Client ID |
Enter the Zoom Client ID |
|
Client Secret |
Enter the Zoom Client Secret |
|
Account ID |
Enter the Zoom Account ID |
- Click Save after entering all the required details and click Test Connection, to test the configuration.
- A Connection successful message will be displayed on screen along with the time stamp.
- If the connection is not successful an error message will be displayed. Refer Troubleshooting Connector Validations for more details on the error message.
Once the connector is configured, validate if the connector is listed under Collection Status screen with status as Active. This signifies the connector is configured successfully and data is ready to ingest.