
Follow these steps to set up SAML authentication in DNIF Console:
- Login to DNIF Console using customer admin credentials.
- Navigate to the Administration tab
 and select Organizations.
 - Click the
 button next to the organization where you want to enable SAML authentication and choose SAML from the dropdown menu. This will open a configuration form.
 - Click the Create SAML SSO button and copy the Entity ID URL and SSO URL provided.
- Open your Okta account to configure the SAML integration.
Here's how to set up SAML integration on Okta:
- Log in to your Okta account.
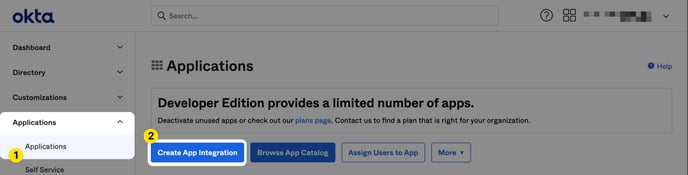
- Navigate to Applications > Applications from the main menu and click on create app integration.
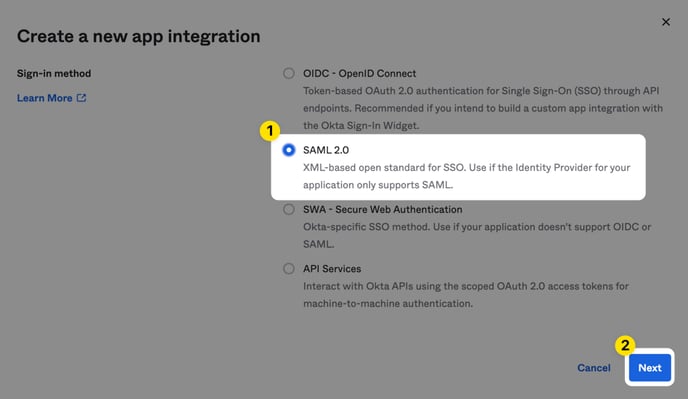
- Select SAML 2.0 as the sign-in method and click Next.
- Name the application and optionally upload the DNIF logo.
- Proceed to the SAML Settings page and fill in the form fields with the values copied from the DNIF console's SAML configuration.
- Single Sign-On URL: Paste the SSO URL from DNIF console.
- Audience URI: Paste the Entity ID URL from DNIF console.
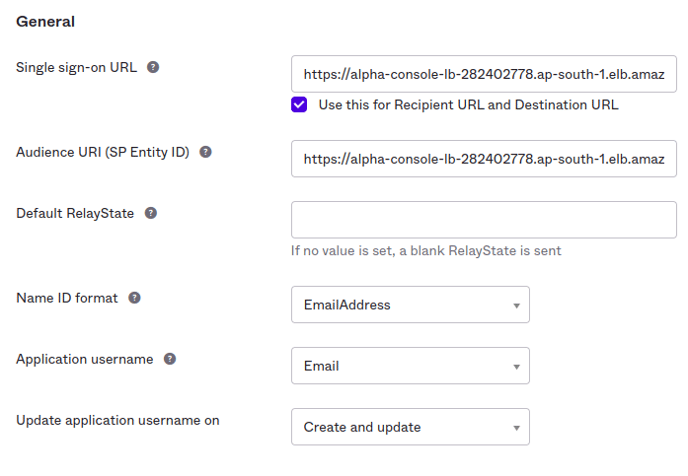
- Set the Name ID format to EmailAddress, Application username to Email, and ensure that Update application username is set to Create and update.
- In the Attribute Statements section, create a custom attribute name as required.
Scroll down to the bottom of the page and click Next.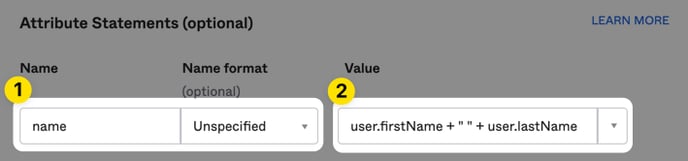
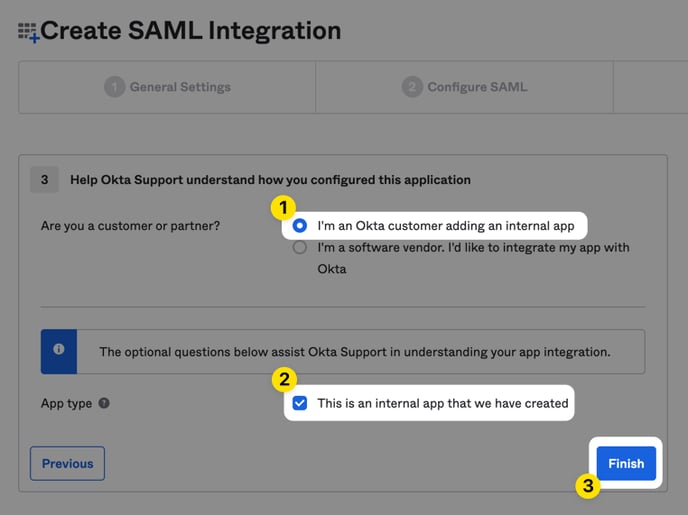
- Mark the app as an internal application, then click Finish to complete the creation of the SAML 2.0 application.
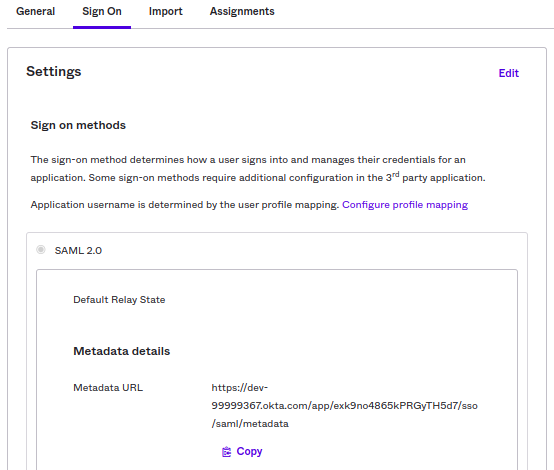
- In Okta, go to the Sign On tab for the DNIF application, scroll down, and copy the Metadata URL.
- Return to the DNIF console and navigate to the Administration tab > Organizations.
- Click the button next to the organization where SAML authentication should be enabled. The configuration form will open.
- Fill out the Manifest URL copied from Okta (Step 10) and save the configuration.
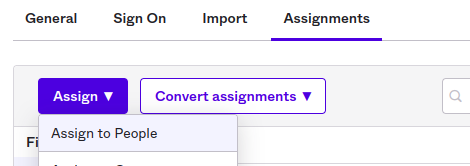
- Finally, go to the Assignments tab for the DNIF application in Okta and assign the accounts that should have access to the DNIF application.
Follow these steps to successfully set up SAML authentication with DNIF HYPERCLOUD. If you encounter any issues, feel free to reach out to our support team for assistance.