
Azure Connector pulls logs from Azure Event Hubs service.
Prerequisites
The following prerequisites are to be met:
- Create a resource group
- Create a storage account
- Create an Event Hubs namespace
- Create a container
- Create an Event Hub
- Storage Account Access Keys
- Connection String for Event Hub
Create a resource group
- Sign in to the Azure portal(login.microsoftonline.com/).
- In the left navigation, select Resource groups and then select Add.
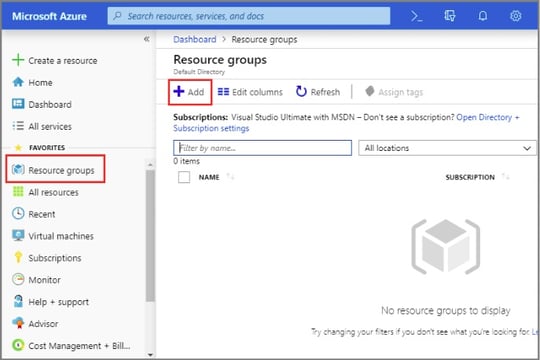
- For Subscription, select the name of the Azure subscription in which you want to create the resource group.
- Enter a unique name for the resource group. The system immediately checks if the name is available in the currently selected Azure subscription.
- Select a region for the resource group.
- Click Review + Create.
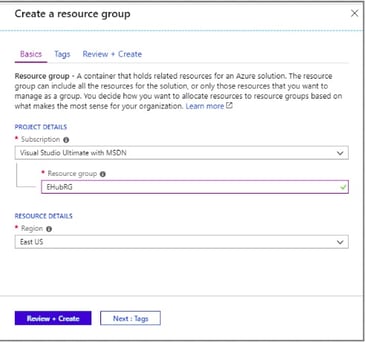
- On the Review + Create page, select Create.
Create a Storage Account
To create an Azure storage account with the Azure portal, follow these steps:
-
From the left portal menu, select Storage accounts to display a list of your storage accounts.
-
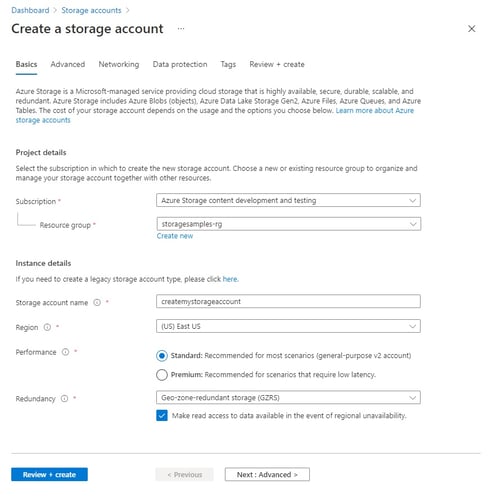
On the Storage accounts page, select New. The following image shows a standard configuration for a new storage account.
-
On the Basics tab, provide the essential information for your storage account.
-
Select Review + create to accept the default options and proceed to validate and create the account.
-
You can also choose to further customize your new storage account by setting options on the other tabs.
-
For more information refer.https://docs.microsoft.com/en-us/azure/storage/common/storage-account-create?tabs=azure-portal
Create an Event Hubs namespace
- An Event Hubs namespace provides a unique scoping container, in which you create one or more event hubs.
To create a namespace in your resource group using the portal, do the following actions:
-
In the Azure portal, select Create a resource at the top left of the screen.
-
Select All services in the left menu, and select star (*) next to Event Hubs in the Analytics category. Ensure Event Hubs is added to FAVORITES displayed in the left navigation menu.
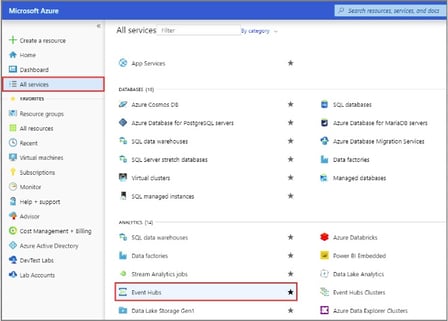
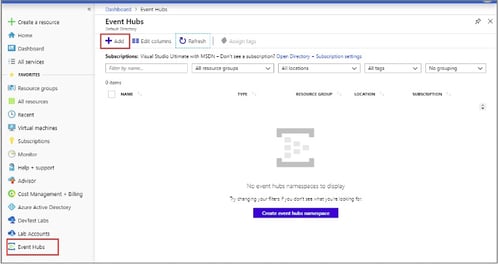
- Select Event Hubs under FAVORITES in the left navigation menu, then click Add displayed on the toolbar.
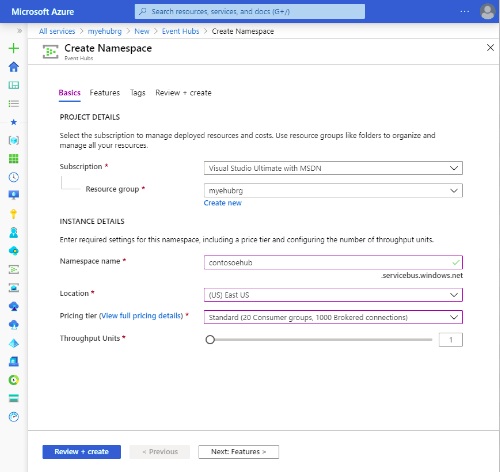
- On the Create namespace page, follow the steps below:
- Select the subscription in which you want to create the namespace.
- Select the resource group you created in the previous step.
- Enter a name for the namespace. The system immediately checks to see if the name is available.
- Select a location for the namespace.
- Choose Basic for the pricing tier. To learn about differences between tiers, see Quotas and limits, Event Hubs Premium, and Event Hubs Dedicated articles.
- Leave the throughput units (for standard tier) or processing units (for premium tier) settings as it is. To learn about throughput units or processing units: Event Hubs scalability.
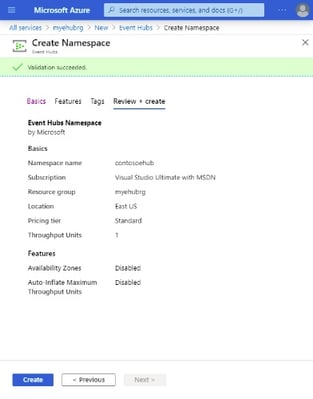
- Select Review + Create at the bottom of the page.
- On the Review + Create page, review the settings, and select Create. Wait for the deployment to complete
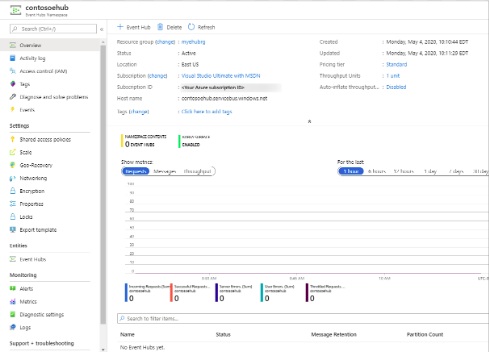
- On the Deployment page, select Go to resource to navigate to the page for your namespace.

- Ensure that you see the Event Hubs Namespace page similar to the following screen
Create a Container
To create a container in the Azure portal, follow these steps:
-
Navigate to your new storage account in the Azure portal.
-
In the left menu for the storage account, scroll to the Blob service section, then select Containers.
-
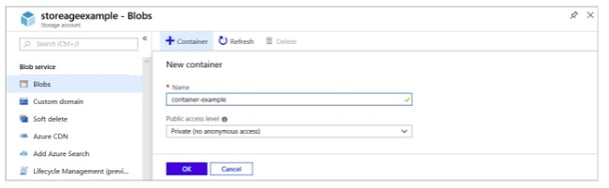
Select the + Container button.
-
Type a name for your new container. The container name must be lowercase, must start with a letter or number, and can include only letters, numbers, and the dash (-) character. For more information about container and blob names, refer Naming and referencing containers, blobs, and metadata.
-
Set the level of public access to the container. The default level is Private (no anonymous access).
-
Select OK to create the container.
For more information on creating containers refer
https://docs.microsoft.com/en-us/azure/storage/blobs/storage-quickstart-blobs-portal
Create an event hub
To create an event hub within the namespace, do the following actions:
-
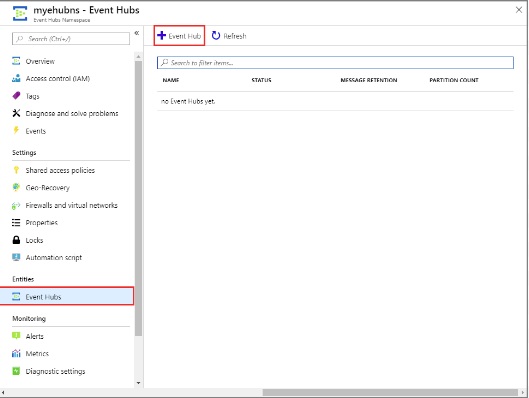
On the Event Hubs Namespace page, select Event Hubs in the left menu.
-
At the top of the window, select + Event Hub.
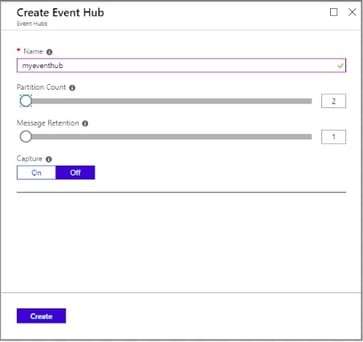
- Type a name for your event hub, then click Create.
-
The partition count setting allows you to parallelize consumption across many consumers. For more information, see Partitions.
-
The message retention setting specifies how long the Event Hubs service keeps data. For more information, see Event retention.
-
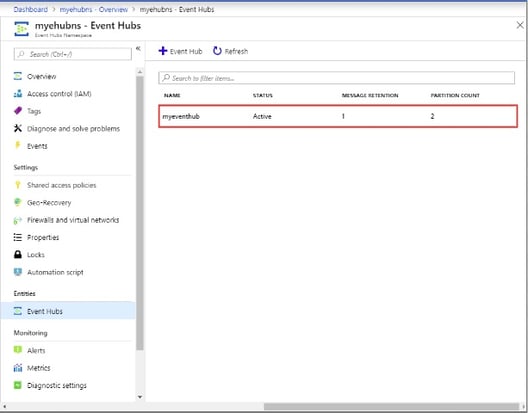
You can check the status of the event hub creation in alerts. After the event hub is created, you can view it in the list of event hubs.
-
Start capturing for eventhub (if turned off) by referring to following link: https://docs.microsoft.com/en-us/azure/event-hubs/event-hubs-capture-enable-through-portal
-
Setup eventhub to store diagnostic logs, take the following steps:
- Navigate to eventhub namespace you created in previous steps.
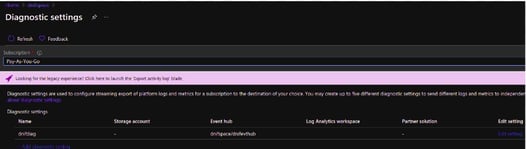
- In the search bar, search, and select Activity Log.

-
- In the Activity log window, click Diagnostic Settings.

- In the Diagnostic Settings window, click Add Diagnostic settings.
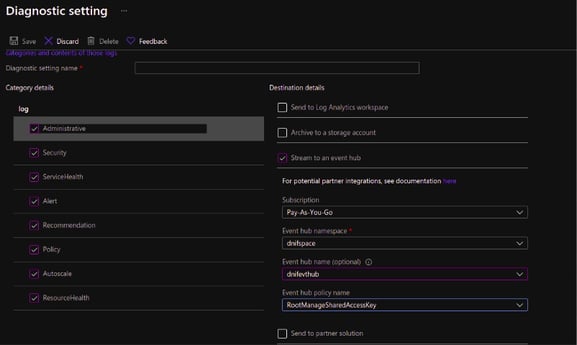
- Select the log type in Category details that you want to ingest.
- Select the Stream to an event hub checkbox and then select the following:
- Subscription: Pull-down, select a subscription.
- Event Hub Namespace: Pull-down, select the namespace created in the previous step.
- Event Hub name (optional): Select Eventhub name created in the previous step.
- Event hub policy name: Leave the default policy.
- RootManageSharedAccessKey, or select another as desired.
- Click Save.
- In the Activity log window, click Diagnostic Settings.
- Storage accounts and eventhubs should have owner access roles assigned.
Storage Account Access Keys
Storage accounts should have owner access roles assigned.
On creating a storage account, Azure generates two 512-bit storage account access keys. These keys can be used to authorize access to data in your storage account via Shared Key authorization. Your storage account access keys are similar to a root password for your storage account.
You can view and copy your account access keys with the Azure portal, PowerShell, or Azure CLI. The Azure portal also provides a connection string for your storage account that you can copy.
To view and copy your storage account access keys or connection string from the Azure portal:
- Navigate to your storage account in the Azure portal.
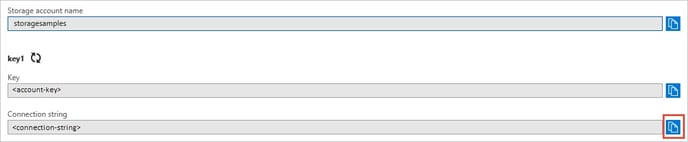
- Under Settings, select Access keys. Your account access keys appear, as well as the complete connection string for each key.
- Locate the Key value under key1, and click the Copy button to copy the account key.
- Alternately, you can copy the entire connection string. Find the Connection string value under key1, and click the Copy button to copy the connection string.
You can use either of the two keys to access Azure Storage, but in general it's a good practice to use the first key, and reserve the use of the second key for when you are rotating keys.
For more details on Storage connection string from the storage account refer:https://docs.microsoft.com/en-us/azure/storage/common/storage-account-keys-manage?tabs=azure-portal
Connection String for Event Hub
-
Sign in to Azure portal.
-
Select All services on the left navigational menu.
-
Select Event Hubs in the Analytics section.
-
In the list of event hubs, select your event hub.
-
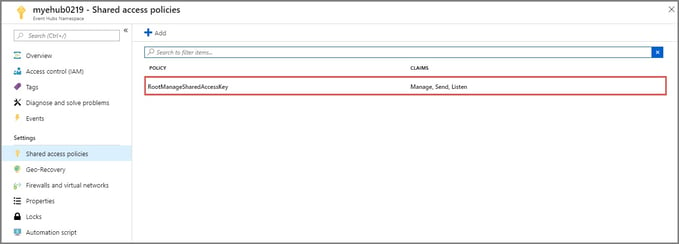
On the Event Hubs Namespace page, select Shared Access Policies on the left menu.
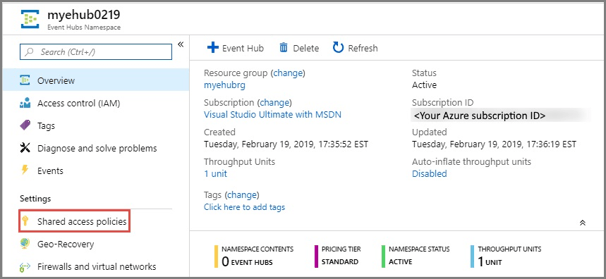
-
Select a shared access policy in the list of policies. The default one is named: RootManageSharedAccessPolicy. You can add a policy with appropriate permissions (read, write), and use that policy.
-
Select the copy button next to the Connection string-primary key field.

For more details on Connection string for eventhub refer: https://docs.microsoft.com/en-us/azure/event-hubs/event-hubs-get-connection-string
Configurations
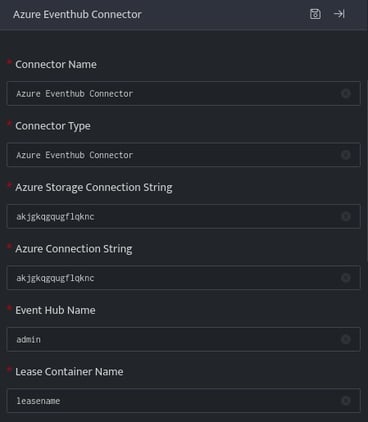
The following are the configurations to forward Azure Event Hub Connector logs to DNIF.
| Field Name | Description |
| Connector Name | Enter a connector name |
| Connector Type | Enter Azure EventHub connector |
| Azure Storage Connection String | Enter the Azure Storage Connection String got from Azure console |
| Azure Connection String | Enter the Azure connection String got from event hub on Azure console |
| Event Hub Name | Enter the event hub name got from Azure console |
| Lease Container Name | Enter the container name where you want to store the bookmarking for eventhub partitions.
|
Click Save, to forward Azure Event Hub Connector logs to DNIF.
Once the connector is configured, validate if the connector is listed under Collection Status screen with status as Active. This signifies the connector is configured successfully and data is ready to ingest.